

Parental Controls on Student Devices: What Parents & Educators Need to Know in 2025
Green Zone App
(Click here to learn more)
Dangerous Social media challenge
(Click here to learn more)
Red Zone App
(Click here to learn more)
Gray Zone App
(Click here to learn more)
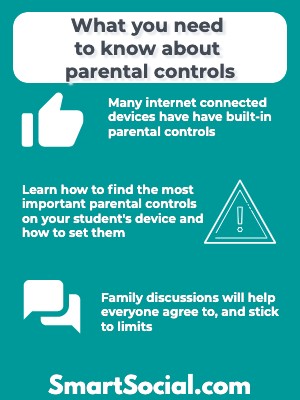
Parents and educators understand the importance of parental controls on student devices, but keeping teens safe while using smartphones and tablets can be an enormous challenge. Fortunately, both Apple and Android devices have some great built-in options that can be customized to fit individual needs. These parental control tools can help parents make sure students only see age appropriate content so they can keep students safe in the online world.
We always recommend creating a Family Media Agreement and going through our Family Dialogue Guide to help set the right expectations, properly set up parental control settings, and help students develop good habits with technology and social media. This is an important step for a child who has just gotten a new smartphone, one who has had one for a while, or for a family that needs to make more concrete rules or set new expectations about technology use.
Educators and parents: Guide your students' reflection and discussion with this student worksheet. (Log in to your Google account and select File-->Make a Copy)
Start With a Family Media Agreement & Dialogue Guide
Parental controls are valuable tools for keeping your children safe online and helping them to balance their screen time, but the most effective starting point is to engage in a rich dialogue with your kids. By establishing clear expectations and explaining the reasons behind them, you make it clear to your children that you are a trustworthy person to confide in if they encounter anything online that makes them uncomfortable.
View the SmartSocial Family Media Agreement template to see different options for creating and discussing expectations for any device with your students.
Family Media Dialogue Guide & Agreement Templates (Video)
Why Is It Important to Use Parental Controls?
Parental controls are essential in today’s digital age to keep kids and teens safer from potential online risks. Smartphones open up a lot of opportunities for teens but they also come with some risks.
Smartphones often make students feel stressed, anxious, open them up to the risk of cyberbullying or online predators, and contribute to screen time addiction.
Creating a family media guide is an important first step, but following it up with parental controls can help safeguard your kids online and help keep their screen time in check. Setting parental controls can help students avoid inappropriate content, set screen time limits, and restrict access to apps that are not parent approved.
Does your Family Need Parental Control Software?
Both Apple and Android phones and devices come with built-in parental control features. However, you can also explore third-party parental control software for added reassurance.
As with any parental controls, we encourage you to continue to monitor your kids’ activities online and keep an open line of communication with them. Even if you block apps or forbid certain social media apps, some students can be very skilled at finding alternatives so it's important to stay alert.
If you decide third-party software is right for your family, we have done the research for you and found all the best choices . Explore the various options in our Parental Control Software & Cell Phone Monitoring Comparison Guide.
Apple Screen Time Parental Control Guide
- Click here to view the complete guide for Parental Controls on iPhones and Other Apple devices
- Download our Apple Parental Controls Quickstart Guide here and go through the process step-by-step
- Click here to learn how to turn off file sharing on an Apple or Android device
Android's Digital Wellbeing Guide for Parents
- Download our Android Parental Controls Quickstart Guide here and and go through the process step-by-step.
Google Family Link Guide
Parental Controls on Amazon Tablets
Amazon Kids (formerly FreeTime) lets you choose what content your child sees, create educational goals, and set time limits by activity.

- To get started, tap on the Amazon Kids app
- Select the profile for the child you would like to set limits for
- “Set Daily Goals & Time Limits.” Tap the toggle to enable settings for your child
Setting up Child Profiles
Child profiles allow each kid in your household to have a customized Amazon Kids+ experience.
What can Kids+ do? (According to Amazon)
- Establish a bedtime
- Set screen time boundaries
- Create goals
- Use Smart Filters
Managing content
Although there are thousands of books, apps, TV shows, and movies within Amazon Kids+, each profile is customizable to add or remove content for a hand-crafted experience for each child.
What can be managed:
- Set language preferences
- Share titles you've purchased to your child's profile
- Remove subscription content from your child's profile
- Fire on the go
- Amazon Kids web browser
More parental control and student device resources
- Best Screen Time Apps for Students
- Parental Control Software & Cell Phone Monitoring Comparison Guide
- 5 Tips for Improving your Family's Digital Security
- 5 Ways to Protect Your Kids in the Digital Age
- Top 5 Kids Cell Phone Safety Tips for Parents
- Can Monitoring Apps Help Manage Screen Time?
- How Parents can Monitor Kids Online (Without Being Intrusive)
Conclusion
There is no device or app setting that can replace the importance of ongoing communication between students and parents. While these recommended parental control tools can contribute to students' online safety and limiting screen time, it's crucial for parents and educators to actively engage with students, educate them about online risks, guide them in making responsible choices, and foster positive digital habits to keep kids safe online.
Listen to Beth & Andrea discuss parental controls and the Family Media Agreement on MomTalk
Protect your family and enter for a chance to win cool prizes
Become a member or log in to learn more on this topic

This is great info, thanks for giving me some ideas on how to start a dialogue with my teen!

Sharon M.
Parent VIP Member
Josh's presentation about social media was unbelievably fantastic. Our students learned so much about what kids should and shouldn't be doing. The fact that it is such a thoughtful process made it all worthwhile.
Director of College Advising
Educator Webinar Attendee
This webinar is a very helpful eye-opener on the apps that are popular with my students.
Irene C.
Educator Webinar Attendee
Protect your family and enter for a chance to win cool prizes

., start learning from this page to earn points!*
Hello, I'm Josh, the founder of SmartSocial.com.
Don't leave this page until you fill out our feedback form that will appear after you learn from the resources...
Join Our Next Live Parent Q&A Events (Bring Your Kids!)
.jpg)
Protecting Your Child’s Confidence Before Screens Turn Mean (Live Session #3)
Cyberbullying can destroy a child’s confidence long before parents even realize it's happening. Join our live parent event to learn how to spot the signs, protect your child, and build a safer digital future together.
Protecting Your Child’s Confidence Before Screens Turn Mean (Live Session #4)
Cyberbullying can destroy a child’s confidence long before parents even realize it's happening. Join our live parent event to learn how to spot the signs, protect your child, and build a safer digital future together.
Protegiendo la confianza de tu hijo antes de que las pantallas se vuelvan crueles (Sesión en Vivo en Español)
Traiga a sus hijos a este evento en vivo para padres y aprenda cómo combatir el acoso en línea y mantener a sus hijos seguros en Internet.
.jpg)
Snapchat & Instagram Teen Risks (Live Session #1)
Discover why disappearing messages and secret accounts appeal to teens and learn simple ways to guide and protect your child online. (Teens welcome!)
.jpg)


Become a Very Informed Parent (VIP) to get our social media suggestions in your email every Tuesday & Thursday.


Hello, I'm Josh, the founder of SmartSocial.com. Protect your family by taking my 1 minute quiz
This quiz will help you understand how safe your family is
Schools & Districts: Partner with us to protect your community online
Our remote presentations (and website) teach over a million parents and students each year how to be safe so they can shine online. We teach students how their accounts can be used to create a portfolio of positive accomplishments that impress colleges and employers.
Join Our Smart Social Podcast
each week on iTunes
With over 500 episodes, Josh Ochs interviews psychologists, therapists, counselors, teachers, and parents while showing you how to navigate social media to someday shine online.
Listen on: